
Chickens were very high on our list of what to have on our homestead, so we really needed a chicken coop. We really wanted to build a proper, permanent and large enough house for a couple dozen chickens right away but the budget is a little tight for a while. Buying a house and paying taxes will do that! As we were sitting on the back deck the other night trying to figure out how we were going to build a chicken coop, a brilliant idea hit me (wife didn’t think so at the time). Why not use the playhouse that the old homeowners left?
The idea was really pretty simple; board up the windows that didn’t have shutters, put a latch on the window with shutters, attach a door and chicken run. That’s exactly what we did.
Step 1 – Secure the windows without the shutters. The playhouse had three windows on two different sides that we needed to secure. Some plywood and toggle bolts took care of those pretty well.
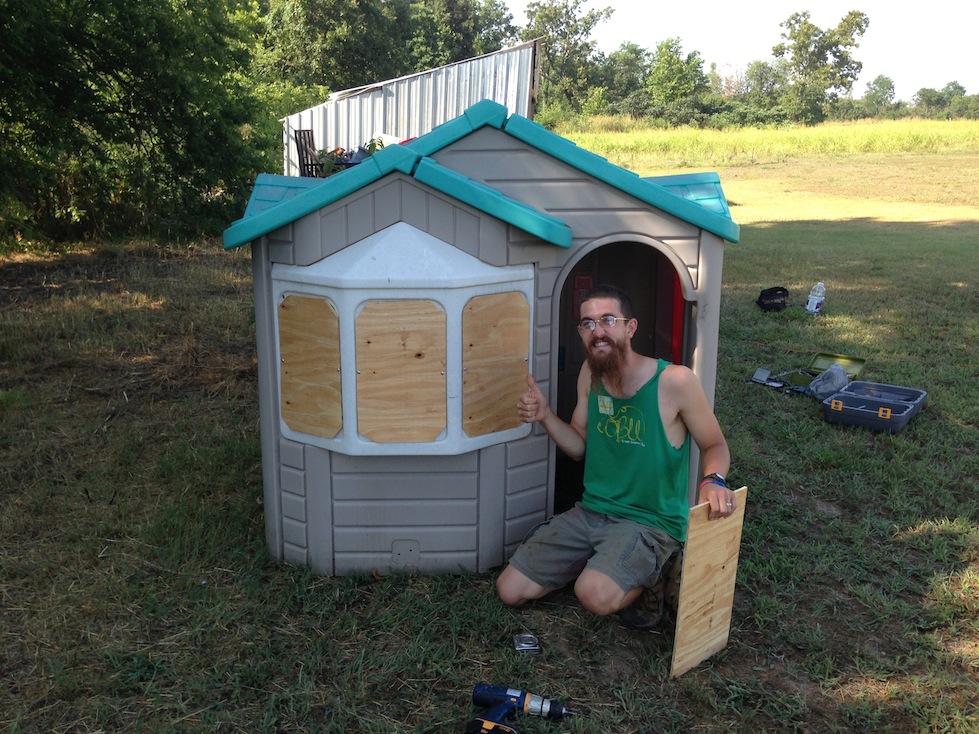
Joe is proud of our handy work
Step 2 – Cut and attach a door. We used plywood for the door which isn’t ideal but again, this is a temporary solution. We picked up some used door hinges and a latch at a local trading post (yes, just like in the old western movies). They worked great to hold the door in place and secure it shut at night.

Windows & Door Secured
Step 3 – Secure the shutters on the side of the house with a latch. We paid about $1 a piece for each latch from the trading post. We used carabiners as to keep the latch closed. These shuttered windows will be the outside access to the nesting boxes so we don’t have to go into the house to collect every day.

Shutters Secured
Step 4 – Build the chicken run. We plan to free range our chickens but wanted a run for them if we leave for a day or two. We used two 16′ livestock panels to make an 8′ x 10′ run. We secured the cow panels by hammering iron stakes in the ground and allowing friction to do the rest. We then overlaid the panels with chicken wire. We rigged a gate at the end of the run so we can access it when necessary. A couple of T-posts worked great for that. The chicken wire is secured to the house by wrapping one end of it around a 2×4 and screwing the 2×4 into the house.

Finishing touches on the run
Step 5 – Build a nesting box and put in some roosts. We were able to re-purpose the plastic fridge that came with the playhouse into two nesting boxes. We attached the nesting box to the window with the shutters so we can have access to the eggs from the outside.

Nesting boxes with access from outside
There happened to be a couple of cabinet doors and a faucet in the house that should make pretty good roosts. We put in a couple of pieces of lumber for additional roosting space.

Roosts
The whole process took under 6 hours and about 4 of it was spent on the run. The run wasn’t difficult or complicated, it’s just time consuming. If you’ve ever worked with chicken wire, you know what I mean.
The only part of this structure I’m not 100% sure is predator proof is the ground around the run. I have plenty of old 2×4 that I can attach to the bottom all the way around if necessary but I’m not too concerned about it. We have two outside dogs that patrol our property 24 hours a day so nothing is going to be able to get under it before my dogs run them off.

Finished chicken coop
The chicken coop is ready for it’s new residents!
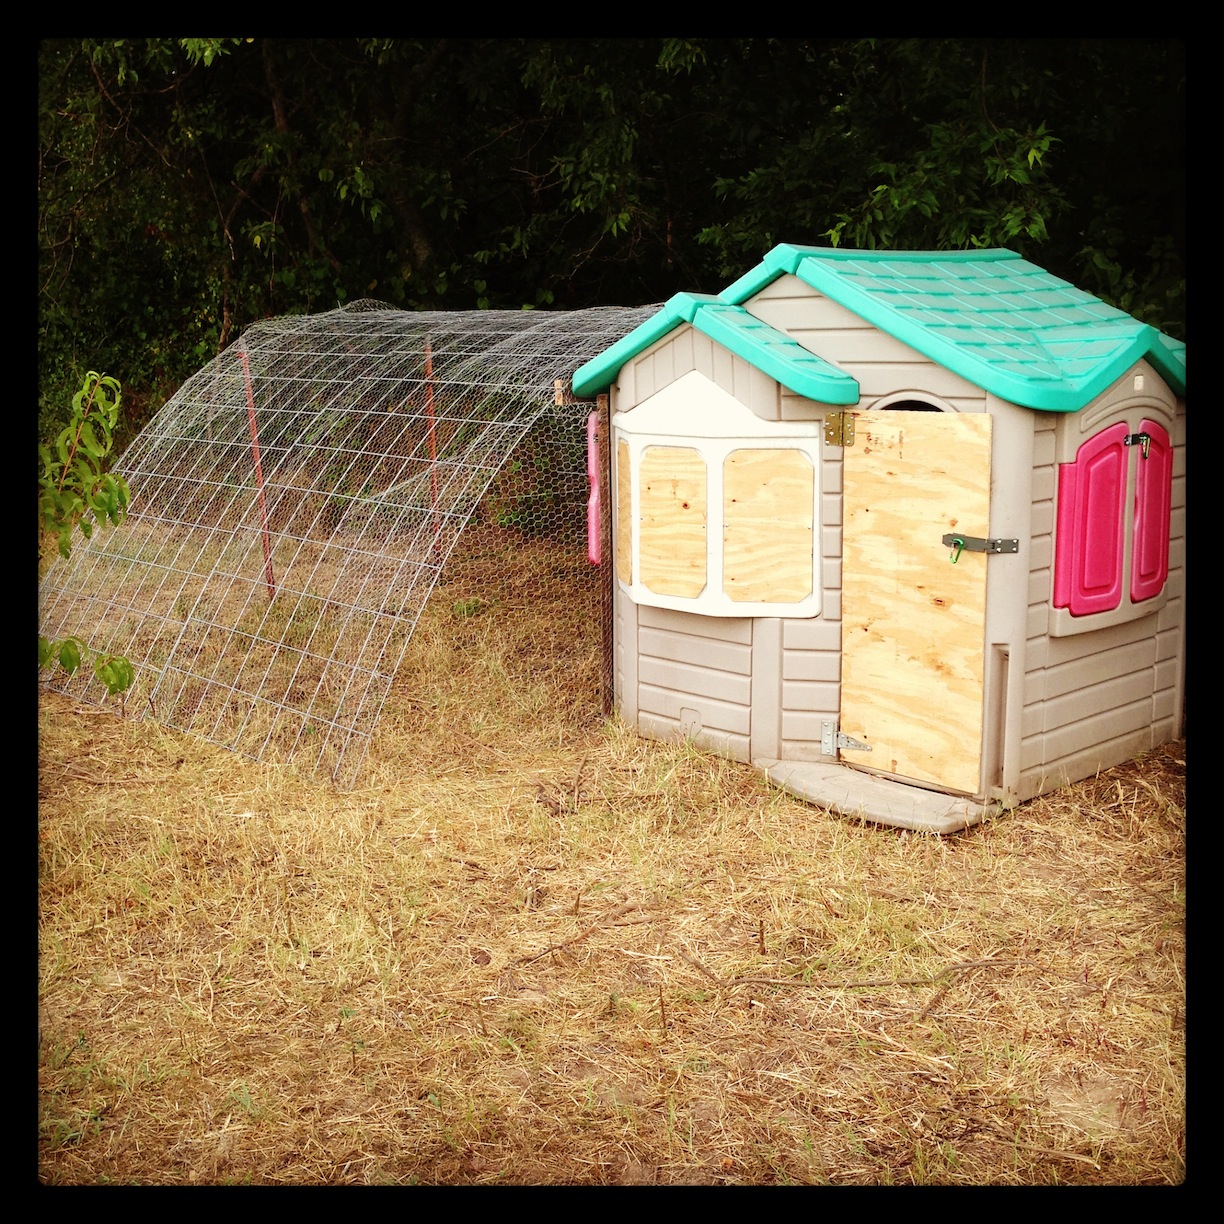
Finished Coop!
